Here In this article, we are going to understand how to Export Customer data to Excel in QuickBooks Online. We will provide a proper format to export customer information from QuickBooks Online to MS Excel.
There are two ways, where you can easily export your customer information to MS Excel. You can do it firstly from the ‘Customer Page‘ and other ways are from the ‘Reports page’. Each method will lead the separate and specific results and will directly affect the information that you want to export to Excel in QuickBooks online.
How to Export Customer Data To Excel from the Reports Page
In this section, you will learn the steps that will help you in exporting customer data from the Reports page. If you are willing to export from the Reports Page, you are required to customize the customer information you want to export to MS Excel. It is more helpful if you are seeking something more specific. It also helps you when you want the capability to customize information.
- The first step is to go to the business overview and select “report” from the left menu.
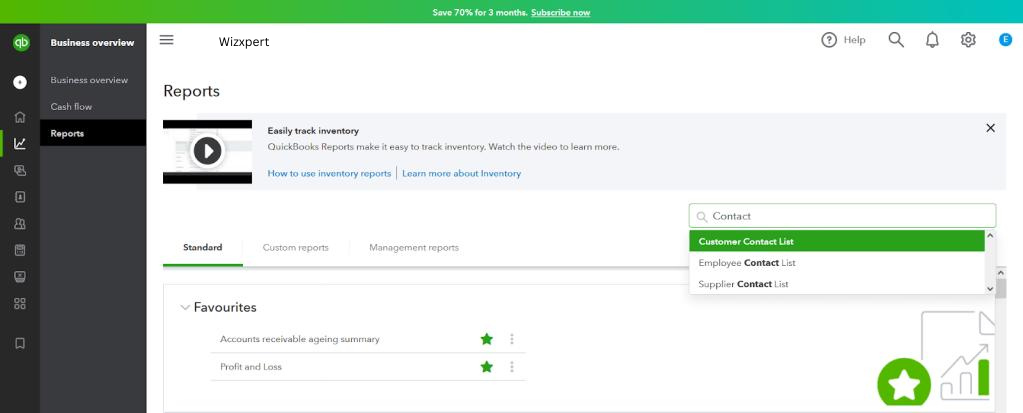
- Then you visit the “ Sales and customer” option.
- Now Select “Customer Contact List”
- Choose the “Change Column” Option from the rows/column drop-down.
- Now add your column manually then click on ”Run Report”
- If you are planning to run the same report(a similar report) not yet but some other time then choose “Save Customization” will see at the upper right
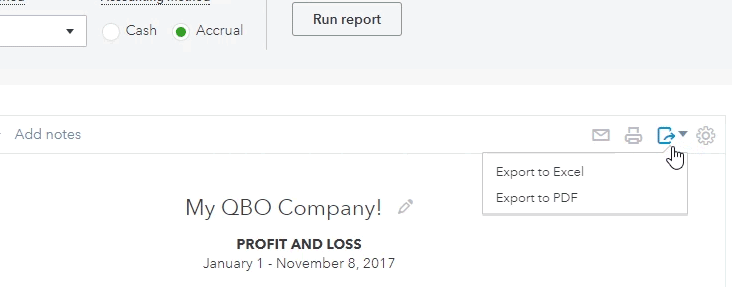
- After that, choose the “Export” icon that is next to the Print icon
- At last, simply choose “Export to Excel”
Tips: You can also modify the report by clicking on the three dots you will see in this format (⋮) icon, and then “Customize”
How to Export Customer Data To Excel from the Customers Page
Here we will discuss the steps that will help you in exporting customer data from the customer page. You are eligible to export customer information such as name, address, email, company, phone number, customer type, attachments, notes, and currency balance.
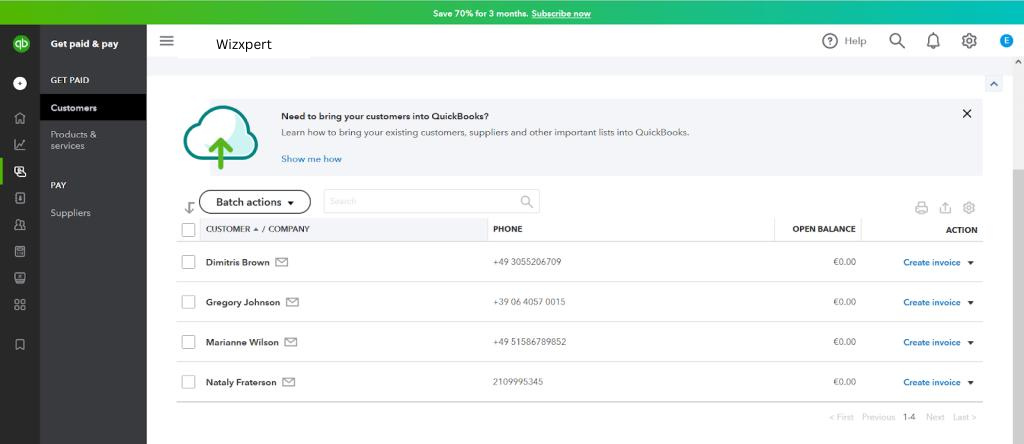
- The first step is to choose “Sales” or Get Paid and Pay from the left menu.
- Now the second step is to click on Customers.
- After that, choose the “Export” icon that will be next to the Print icon.
- In the end, pick “Export to Excel”
Conclusion
Our article successfully ends here with complete guidance containing steps to export customer data to excel. For further inquiries, you can immediately contact QuickBooks Support through the toll-free helpdesk number mentioned above. An alternative ready to contact our experts by dropping emails along with the details of your queries or interacting with us through a 24/7 live chat support service for faster and instant replies.