Are you a user of ShipStation, and wandering for a commerce platform to accelerate your order process and fulfillment? Then connect QuickBooks Commerce to ShipStation. Yes, integrating ShipStation with QuickBooks Commerce will help you to fulfill to ship your product in a better way. In this article, we will show you, how to connect ShipStation with the QuickBooks Commerce platform. In the meanwhile, you can dial our toll-free number +1-844-405-0904 for the assisted support.
What is QuickBooks?
QuickBooks online is software that can help businesses in accounting in their accounting process of creating bills, collecting data, making tax reports, and other tasks. Its can automatic collect data and put it in the record. Automatic data collection reduces human error and saves the time of the accountant in charge. Help get a proper, record that can be used by the owner to make decision in business growth. Because of its online feature, any employee or owner can access the business’s important from anywhere.
What is ShipStation?
ShipStation is an online business that works in the delivery of orders to the customer and provides a proper tracking facility. With this, the customer never breaks their trust in the online stores. It will guarantee the delivery of goods to the customer reach in the given time. It helps different online businesses to properly complete their order which can be add in the financial report using accounting process. It is mainly used by online business platforms like
- Shopify
- Amazon
- Magento
- Wondercide
- Spigen
- Chewy
Steps to Connect QuickBooks Commerce To ShipStation
Follow the below-given procedures to connect the ShipStation with QuickBooks Commerce;
- Authorize the connection
- Create a new ShipStation marketplace
- Fill in the account details
- Set-up your integration
Step 1: Authorize the connection
First of all, you have to allow the connection between ShipStation, and QuickBooks Commerce by following the below procedure;
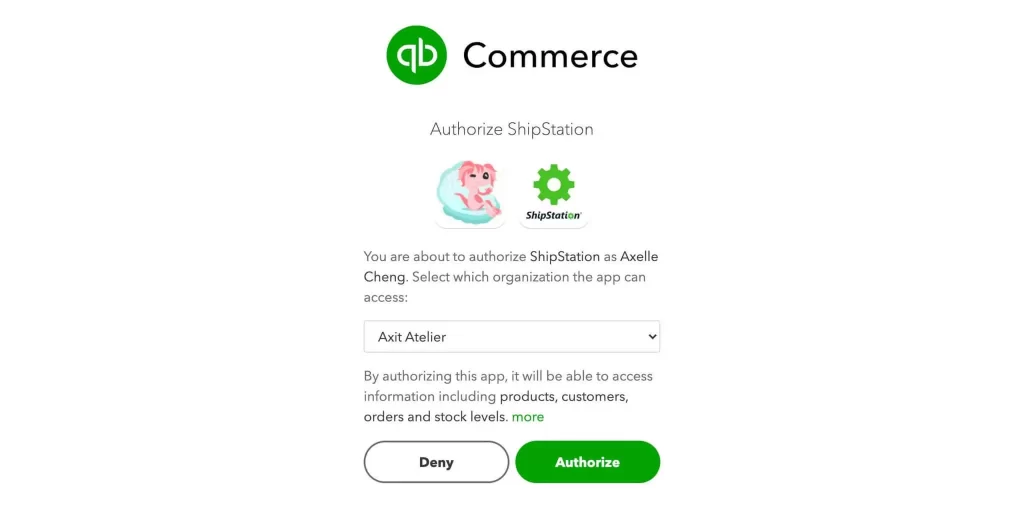
- Go to shipstation.tradegecko.com.
- Select Authorize to connect your QuickBooks Commerce account.

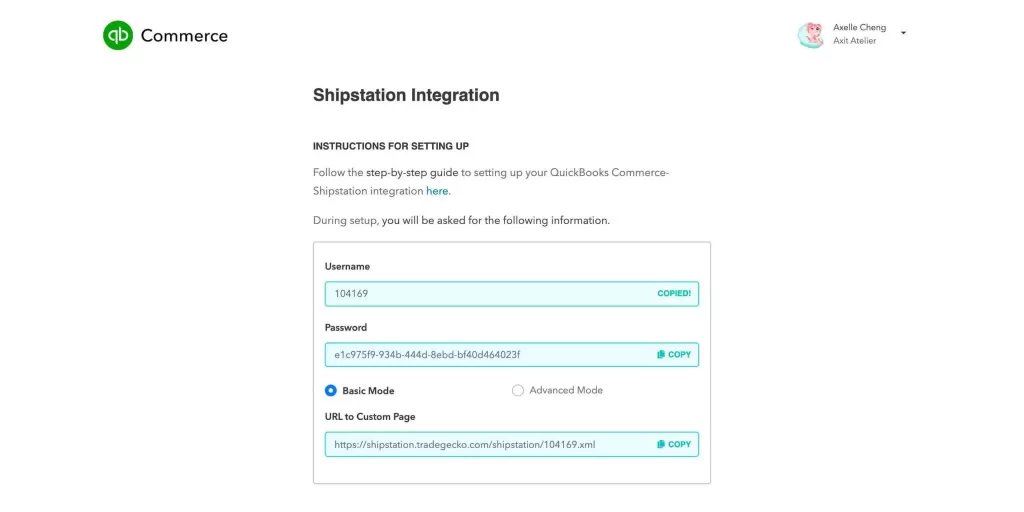
- You will be redirected to a new page generated with details on a; Username, Password, and URL to Custom Page.

- Save your sign-in credentials for the setup.
Note: You need these details to complete the next procedures. Make sure you open this window till the end.
Step 2: Create a New ShipStation Marketplace
In the next step, you have to create a shipment marketplace. For this, follow the below procedure;
- Open a separate tab and log into your ShipStation account.
- Then go to your ShipStation settings page.
- Click on the Connect a Store or Marketplace.
- A new pop-up window will show you an array of available stores or marketplaces.
- Scroll down and click on ‘QuickBooks Commerce’.
Step 3: Fill in account details
Fill out all of the required fields for the account details;
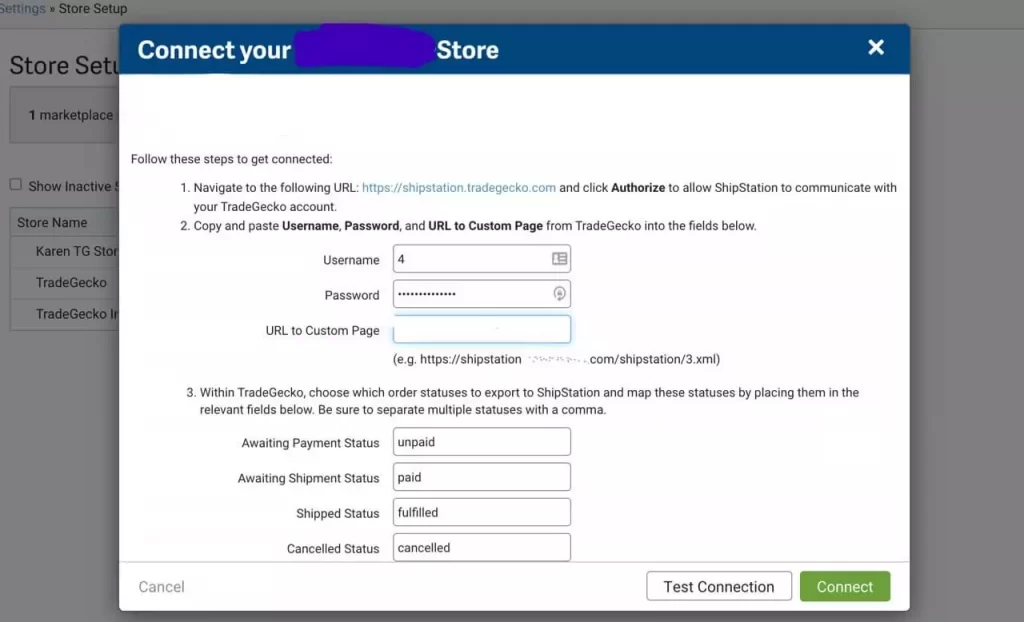
- Copy the entities for ‘Username’, ‘Password’ and ‘URL to Custom Page’ from the initial tab/window as mentioned in Step 1.

- Click on Test Connection to ensure wheater your details are correct or not.
- If your window shows this, click on Connect.
Note: Once you connect QuickBooks with ShipStation, we set the settings to supply you with the simplest experience. Make sure you should not change the default settings.
Step 4: Set up the Store
At the last, set up the store;
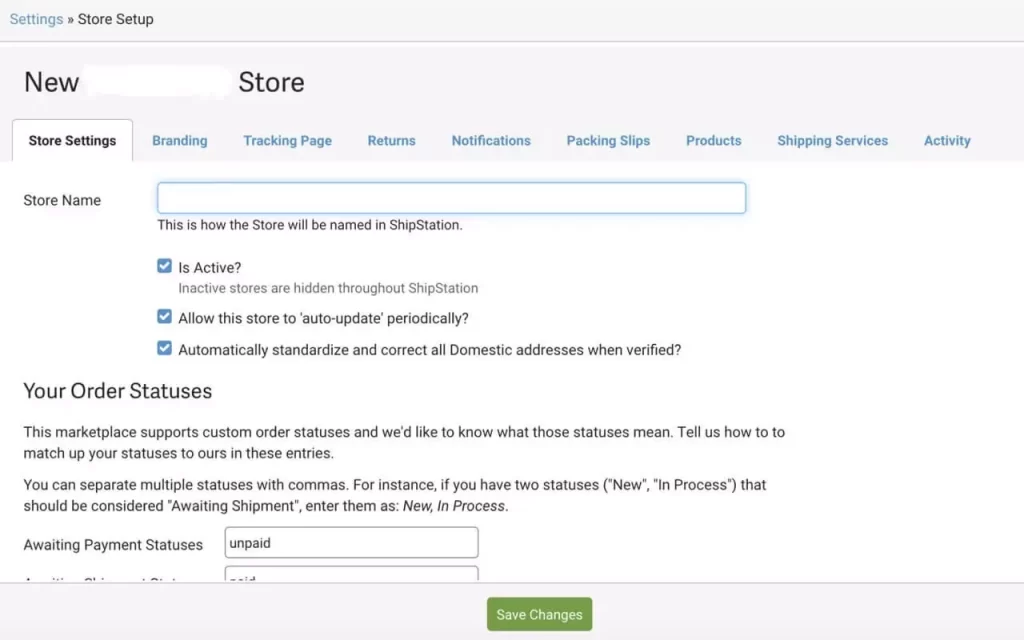
- Go to the Store Settings tab.
- Then enter QuickBooks Commerce as your store name.
- You can explore the rest of the options. But you should leave these options for this time.
- Now select Save Changes.

Congratulations!
Once you complete the above steps, you can see ‘QuickBooks Commerce’ in the Store Setup tab.
- Now go into your ShipStation account,
- Click on the ‘Refresh’ icon. Once you click, it will start pulling through the orders right away.
Note: ShipStation only pulls in Sales Orders once. They have been ‘finalized’ in QuickBooks Commerce.
Benefits of ShipStation Integration with QuickBooks
No doubt that QB is a powerful and famous accounting software to create all the required reports that are necessary to know about the company’s working process. It will be beneficial for the customer to know about their product’s proper details. Some other benefits of ShipStation Integration with QuickBooks are:
- Automatic Entry: The advanced automatic feature of QB helps to collect all the transaction details and store them in the record to create the company transaction report.
- Remove Human Error: automatic data recording removes the human error that was mainly faced when the data was entered manually.
- Simplify the Work: It helps users simplify the process of production by automating the work and creating the product instantly and properly.
- Financial Report: New data will automatically be collected in the report, and a proper financial report of the business will be created.
- Proper view: A proper and understandable report helps to visualize the company’s condition and helps to take important steps to enhance the Business production.
Solve the Errors of ShipStation and QuickBooks Integration
Shipstation QuickBooks Integration can enhance the production process and help to achieve its goal easily without any difficulty. But still, users face some common errors during the integration process of ShipStation to QuickBooks.
- Permission: When ShipStation tries to collect the data from the QB application, it shows an error message on the screen. This can be solved by providing all necessary permissions to prevent this type of error during the integration process.
- Data Style: because of the wrong style of keeping the data, and not all the data are present, it creates an error message. To solve this type of error. You should keep all the data in a given order and don’t leave any place blank.
- ShipStation: If you are facing any problem related to collecting orders from the store, then you should properly verify that you have given all the permissions to collect data from the store and keep the tracking details also.
- Security: Sometimes the integration of ShpStation to QB is blocked due to system security reasons.
- Internet Connection: Most of the connection is lost due to a problem with the internet connection during the procedure. To solve this, you have to keep a stable internet connection to prevent any type of error during the integration process.
- Support Team: Some of the errors cannot be solved properly with the steps. So you can contact the help team to solve the error.
Tips to Manage Store in ShipStation
Here are some of the tips, which will help you to manage your ShipStation store in QuickBooks Commerce;
- ShipStation doesn’t support partial quantities (example, 2.5 units) in order line items. Make sure you use whole numbers when you create orders in QuickBooks.
- The system overlooks any mismatches in shipping costs between QuickBooks Commerce and ShipStation. Assure that you fulfil shipping costs through QuickBooks Commerce.
- You’ll need to manually control any number mismatches in your accounting app.
- ShipStation needs a valid country code for shipping and billing addresses. if it can’t find a valid mapping, it will insert the country as you have it in QuickBooks Commerce.
So those are the approaches for connecting QuickBooks Commerce to ShipStation. Once you follow all the steps you can integrate your QuickBooks Commerce account to ShipStation properly.
Hopefully, this will be useful for you. Feel free to contact our certified QuickBooks experts for any kind of queries, or doubts regarding this article.
