Want to track mileage in QuickBooks Online? Wizxpert is here, with another fussiest article i.e, How To Track mileage in QuickBooks Online in very easy steps. Mileage related to your business can grow rapidly. To track, mileage goes through the complete article and read it completely to get your desired result, with the proper arrangement of steps along with the images related to the task. Hope to track the mileage would be performed by you with ease, but if you have any problem in doing so then contact us on :+1-844-405-0904
You can use QuickBooks Online mobile app to track your business mileage automatically. You just need to do is classify your trips with a quick swipe. You can also manage your trips and track all the activities in the app or web browser.
When it is time to tax, you have all the information you need to reduce your profits and expenses. So let’s move further and discuss the steps on how to track mileage in QuickBooks Online.
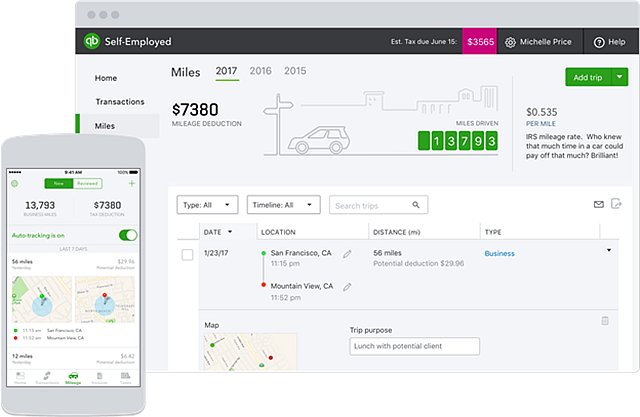
Table of Contents
Features of QuickBooks Mileage Tracker
- Income & Expense Tracking: You can easily add your bank and credit card accounts to track earnings and expenses. This feature maintains the reports of mileage tracking in the QuickBooks Online version.
- Trip Classification: You can select the type of trip to be categorized between personal and business. It allows you to add trips that are not in your account to be included in your expenses to submit an expense claim to clients.
- Automatic tracking: QuickBooks Online is the best accounting application that automatically logs mileage every time you drive.
Steps To Track Mileage in QuickBooks Online

Step 1: Turn on mileage auto-tracking
Before you begin, first check your correct permission. In QuickBooks Online only Master Admins are allowed to track mileage. And later switch on the auto-tracking feature.
- First, you need to open your QuickBooks mobile app and look for the Mileage option and click on it.
- Now click on Auto-tracking and toggle Auto-tracking on.
And also, remember to enable your mobile device’s location permissions.
If you are using an iPhone or iPad (iOS) then be sure your phone’s location permissions are set to “Always”. And if you want the most accurate trip tracking, then don’t forget to enable motion and fitness permissions also.
If you using an Android phone or tablet the be sure your phone’s location permissions are set to “Allow all the time” and also set your physical activity permission to “Allow.”
Step 2: Add your vehicle information.
Before you start tracking your mileage, we advised you to add your vehicle information to record your vehicle purchase.
- First, log in to QuickBooks Online via the web browser.
- Later, look for the Mileage menu and click on the vehicle icon.
- Choose to Add a vehicle.
- Insert the make and model, the ownership status, and other additional info.
- Now, click on Save.
Go with below to edit info about your vehicle:
- First, log in to QuickBooks Online via the web browser.
- Later, look for the Mileage menu and click on the vehicle icon.
- Now, look for the vehicle that you need to edit in the list and click on Edit.
- Click on allow to Make your changes.
- Choose to Save.
Step 3: Track and classify your trips
The QuickBooks Mobile App itself traces everything for you. When you are driving, it automatically detects your starting and stopping points.
After finishing the trip, classify the mileage as a business or personal:
- Go to the Mileage option and click on it.
- Now, swipe left, if you want to categorize the trip as Business. Or swipe right if you want to categorize it as Personal.
- Add a purpose for the trip for business trips
- Click on the vehicle that you used.
- Now, click on Save.
Manually track your mileage
In case, if you forgot to track a trip or if you want to track your mileage manually, then go through with the below steps. You can add trips manually anytime.
For Android and IOS devices
- Firstly, open the QuickBooks Mobile app and select the Menu.
- Now click on the mileage tab.
- After that, choose the Unreviewed tab.
- Locate the trip and then categorize the trip, swipe left to Business, and swipe right to Personal.
- Now, you have to add a purpose for the trip.
- Choose the vehicle that you used, and click on the save button.
For Web Browser
- Navigate to the Expenses option and then click on the Mileage.
- Click on the checkbox after finding a trip.
- For selecting a type choose between Mark as Business or Mark as Personal.
- Check the details.
- You can edit the location or distance of a trip by selecting it, making your changes, and then selecting Save.
Step 4: Edit and export your mileage
Go with the steps to edit a trip, and log in to QuickBooks Online via a web browser.
- Click on the Mileage menu.
- Click on the All or Reviewed option.
- Now, look for the trip you need to edit.
- Click on More▼ and then choose to Edit.
- Click on allow to Make your changes.
- Choose to Save.
Go with the steps to export mileage data.
- Click on the Mileage menu.
- Then, go with the Export option.
In .csv format QuickBooks downloads your trips. If you can’t able to find the report then once check your Downloads folder.
The above are the steps on how to track Mileage in QuickBooks Online. Hope you find this article helpful according to your query.
But if still have any issue or query regarding the same or any accounting and bookkeeping issues then you can directly reach us by dialing our toll-free +1-844-405-0904 and discuss your query with our Intuit certified ProAdvisors.